I’ve always been drawn to the bold, polished look of acrylic nails—they transform weak nails into stunning statements with a bit of creativity. Acrylic nail kit have become a go-to for beauty enthusiasts in 2025, offering a way to achieve salon-quality results at home. Whether you’re new to nail enhancements or a seasoned pro, this guide will walk you through everything you need to know about acrylic nail kits, including their definition and history, how they differ from natural nails, the materials involved, benefits, application steps, precautions, and a final takeaway. Let’s dive into the world of acrylic nails and get those tips shining!
Definition and History
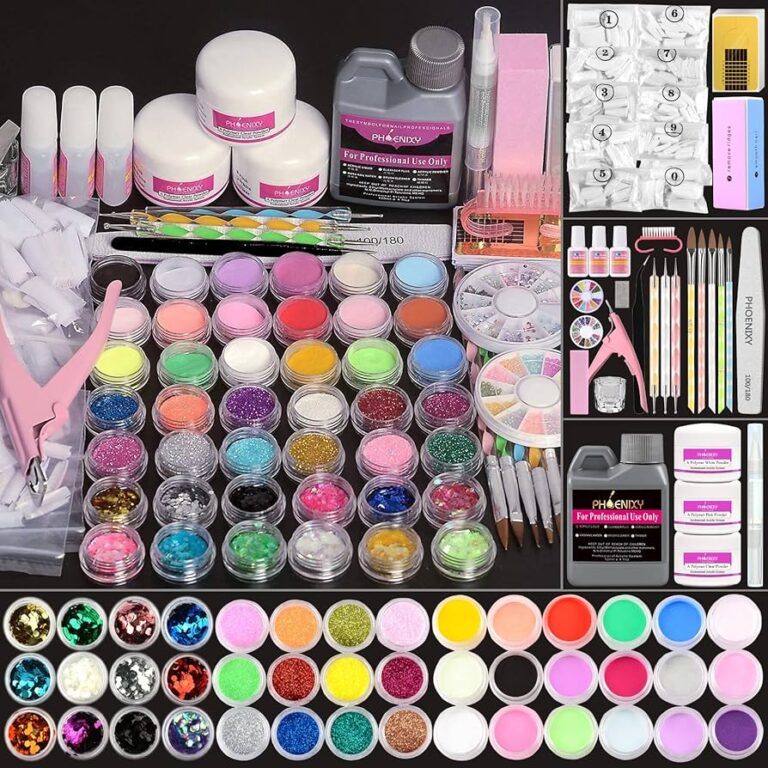
Acrylic nail kits are sets of products and tools designed to create artificial nail enhancements at home, mimicking the professional salon process. They include a liquid monomer, powder polymer, brushes, and other essentials to build durable, customizable nails. The concept traces back to 1954 when Dr. Fred Slack Jr., a dentist, accidentally invented acrylic nails after cutting his thumbnail and using dental acrylic to repair it. Alongside his brother Tom, he refined the technique, founding Patti Nails and launching the beauty trend. By the late 20th century, acrylics became a global sensation, evolving with innovations like odor-free formulas and varied application methods, making them a staple for nail lovers in 2025.
How They Differ from Natural Nails
Unlike natural nails, which are made of keratin and grow from the nail matrix, acrylic nails are synthetic extensions applied over the natural nail. Natural nails are flexible and limited by their growth rate and shape, while acrylics offer a hard, customizable layer that can extend length and reshape nails into styles like stiletto or coffin. They provide a stronger, more uniform surface, perfect for intricate nail art, but lack the organic resilience of natural nails, requiring maintenance to avoid damage. I love how acrylics turn my short, brittle nails into a bold canvas—something natural nails alone can’t achieve!
Materials Used
Creating acrylic nails involves specific materials from a acrylic nail kit. The core components are a liquid monomer (usually ethyl methacrylate, or EMA) and a powder polymer, which mix into a paste that hardens on the nail. You’ll also need a quality brush (often size 8) for application, nail tips or forms for extensions, nail glue, a primer to enhance adhesion, and a top coat for shine. Some kits include dappen dishes for mixing and files (240-grit for prep, finer for shaping). I prefer kits with EMA over banned methyl methacrylate (MMA) for safety—check labels to ensure you’re using the right stuff!
Benefits
The benefits of acrylic nail kits are hard to overlook. They add strength and durability to weak or brittle nails, lasting 3-4 weeks with proper care—ideal for active lifestyles. Their versatility shines with endless shapes, lengths, and nail art options, from simple French tips to elaborate designs. They also protect natural nails by acting as a shield, and with practice, home kits save money compared to salon visits. I’ve noticed my nails grow healthier underneath acrylics, thanks to the added protection—perfect for keeping them looking fresh in 2025.
How to Apply
Applying acrylic nails with a kit takes practice but is doable at home. Start by sanitizing hands and pushing back cuticles with a cuticle pusher. Lightly buff natural nails with a 240-grit file to remove shine, then apply a thin layer of primer. If using tips, glue them to the nail edge, trim to length, and file to shape. Mix a small bead of monomer and powder in a dappen dish with a brush, apply it from tip to base, and shape smoothly. Let it air-dry for 5-10 minutes, then file and buff for a polished look. Finish with a top coat and optional polish. I take my time with each step—patience pays off for a flawless result!
Precautions
While acrylic nail kits are fun, they come with precautions. Avoid over-filing natural nails, which can weaken them—use a light buffer instead. Ensure good ventilation to avoid inhaling fumes, and never use MMA-based monomers, as they’re banned for causing allergic reactions and nail damage. Apply thin layers to prevent bulkiness, and don’t rush drying—uneven curing can lead to lifting. Removal requires soaking in acetone for 15-20 minutes, so avoid peeling to protect your nails. I always double-check my kit’s ingredients and take breaks every few months to let my nails breathe.
Conclusion
Acrylic nail kits offer a fantastic way to enhance your nails with strength, style, and creativity, making them a hit for 2025 beauty trends. Their ability to transform weak nails into durable, art-ready extensions sets them apart, though care is key to avoid damage. With the right materials, proper application, and mindful precautions, you can enjoy stunning nails at home. Ready to try it out? Grab a quality kit, follow the steps, and elevate your manicure game—your perfect nails are just a brushstroke away!
